How Can We Help?
Enabling Badge printing in the SmartLobby Visitor Admin Dashboard
- Link the printer to your tablet on the SmartLobby Admin Dashboard
- Logon to the admin console
- In the section “Printers” below,
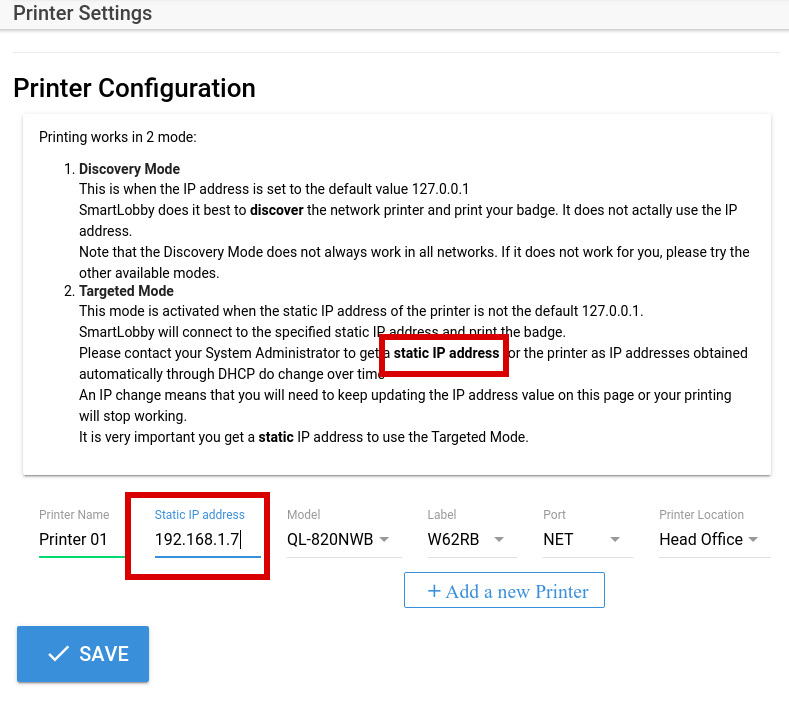 make sure you have selected the proper printer model to match the physical printer you have as well as the label that is installed in the printer.
Please use a static IP address to avoid any future issue with printer such as
“My printer suddenly stopped working!”
as the IP address of your printer changes over time and this will cause your SmartLobby to stop printing.
To avoid this frustration, please talk to your network admin and get a static IP address for your printer.Then, save the configuration
- Go to the Device Configuration screen as shown below
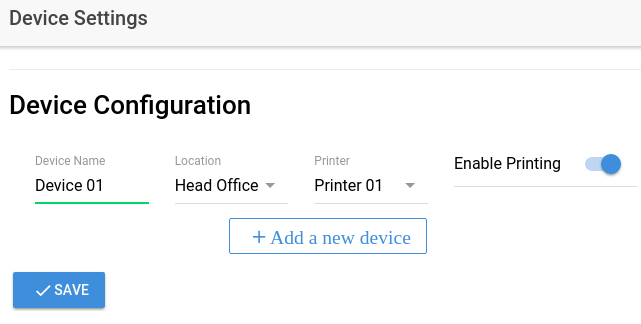
Device
Configuration Screenand make sure that you tick the box “Enable Printing”, then press “Save”
- Turn on your tablet and print
- Now, go through a check-in process on the tablet. At the last stage of the check-in where the badge preview is displayed, you can see at the “Print Badge” button is displayed
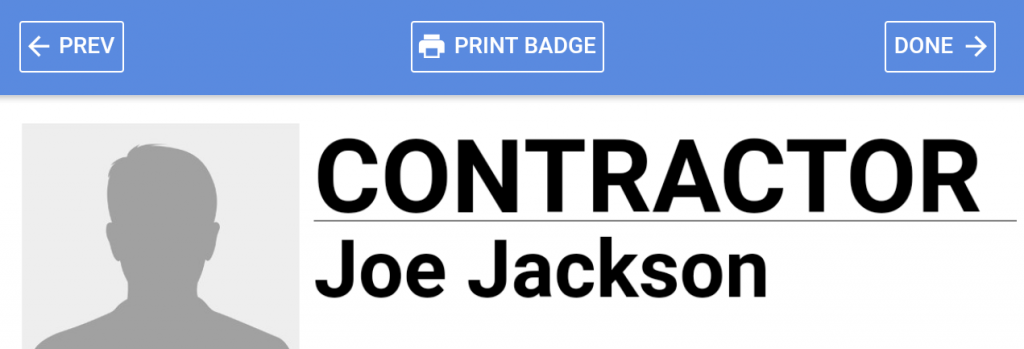
Print Badge Button displayed on last screen - When the “Print Badge” button is pressed, the system will lookup the network printer specified earlier and print the badge
- Now, go through a check-in process on the tablet. At the last stage of the check-in where the badge preview is displayed, you can see at the “Print Badge” button is displayed